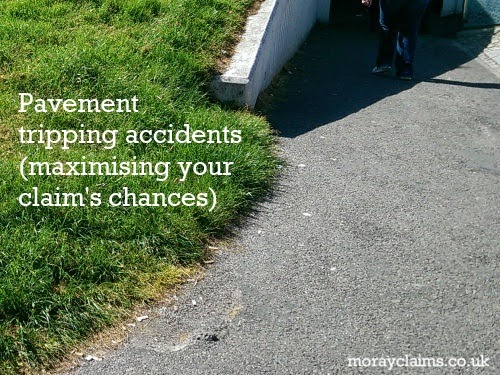
This post covers pavement defects and hazards which can cause you, as a pedestrian, to trip and fall.
The trip hazard (towards the bottom of the above photo, below the bracket sign after the word “chances”) on the footpath pictured above was close to the north side of the underpass at Alexandra Road (A96), Elgin, and to our offices at 1 North Street.
Part of a local authority’s responsibilities
If you are injured as the result of a tripping accident on a public pavement or footpath in Scotland, any claim is usually directed against the local authority.
In Moray, the responsible authority is The Moray Council.
In most cases, the defect in the surface will be the result of erosion over many months (by contrast, in the above case, it was due to the surface of the footpath not being properly smoothed off at the time it was laid).
Where an unexpected edge which causes a tripping accident is created by the effects of nature rather than man, it is often difficult to claim successfully.
The typical requirements for the basis of a claim
In general, 2 main ingredients are necessary for a successful claim in these circumstances-
- The height difference must be at least one inch; and
- You must be able to show that the defect has been present for at least a few months before your accident.
The local authority’s maintenance obligation is to carry out inspections of roads and pavements in their area at reasonable intervals.
Any areas which present a hazard to pedestrians must be repaired within a reasonable period of time following the inspection.
If the local authority receives a report from member of the public about a defect, the duty to repair within a reasonable period arises from the date they receive the report.
A picture is worth …
If you are gathering the evidence you need following an accident of this sort, the best way to record the nature of any defect is to take a photograph of it, ideally showing scale by means of a ruler (as in the photo below) or a coin (a 10 pence coin is 25mm / 1 inch across).
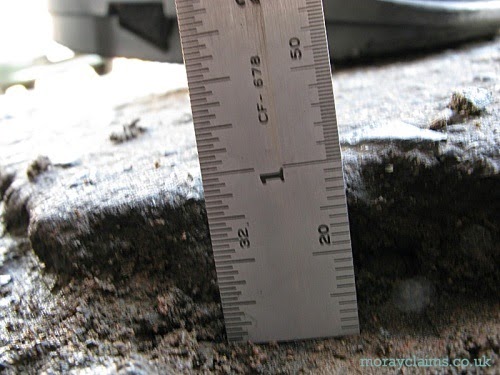
A ruler or coin can be used to good effect in a photo to show the height of the trip hazard
While the photo above gives an excellent worm’s-eye view of the defect, it is also important to take some wider views of the defect (otherwise you cannot clearly identify the locus to the local authority or, later, to a court, if necessary).
The photo below is an example of a more general view of the locus at the place with the close-up of the ruler above.
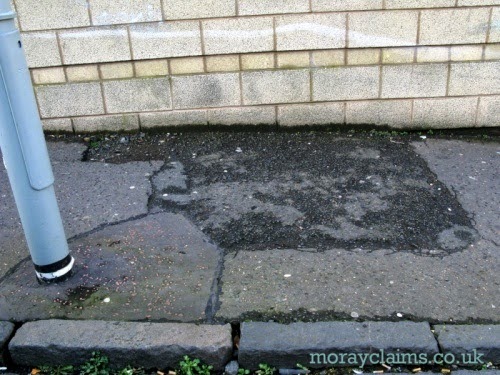
A general view of an accident locus and trip hazard helps to show the context
The defective area is towards the left of the photo (between the lamppost and the wall) and the injured person, walking left to right, hurt himself by stepping partly on and partly off the edge of the defect and going over on his left ankle (so it was not, technically, a “trip”).
The accident happened during the hours of darkness when the hazard was even greater because it was within an area which was in shadow from the adjacent street light.
This is cleverly illustrated in the photograph below, which was very useful in establishing the basis of the claim.
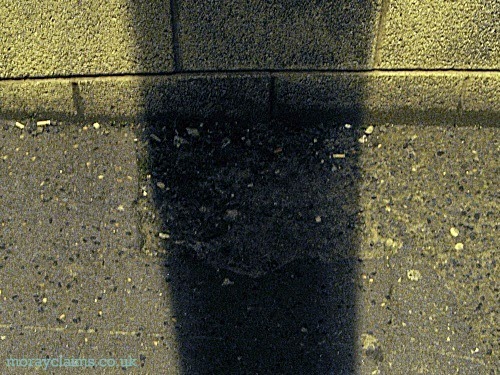
The defect in the pavement here was obscured by the shadow from the adjacent street light
The need for speed
As a practice point, it is important to get your locus photos as soon as possible after your accident.
It’s easy to fall into the trap of reporting your accident to the responsible authority before you have taken any photographs.
The risk is that, when you later go to take photographs, you will find the situation in the photograph below (which is at the same location as the title photograph, just a couple of days later).
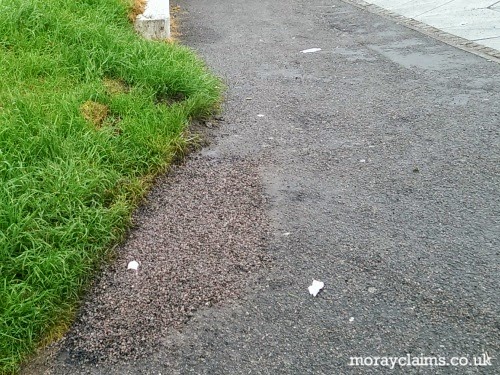
Footpath near underpass at Alexandra Road, Elgin (A96) following repair of defect
In other words, you (or someone else on your behalf) might return to find the defect has been repaired before you’ve taken the crucial photos – in which case you will be lacking essential evidence and you will not be able to prove the nature of the defect was enough for it to be regarded as legally “dangerous”.
This is a more common experience than you might think and it’s frustrating when it happens.
Summary of pavement trip evidence-gathering requirements
So the points to bear in mind in terms of gathering your evidence are:
- Take photos as soon as possible after the accident.
- Include at least one close-up, incorporating some sort of vertical scale (which could be a coin) to show the height difference clearly.
- Take at least one more general, wider-view photo to show the defect in context relative to landmarks nearby such as lampposts, drains, shops etc.
- Ask possible witnesses as to how long the defect has been there before the date of your accident. You may have to be prepared to knock on doors of nearby houses or ask in shops in the vicinity. Get their details and a note of their evidence.
Contact us for help
If you have any questions about an issue relating to a pavement tripping accident or any other type of accident, please get in touch with us for a chat.
You can contact Peter Brash or Marie Morrison on 01343 544077 or you can send us an online enquiry using the form on the page you reach by clicking HERE.
All initial enquiries are without obligation and free of charge.